


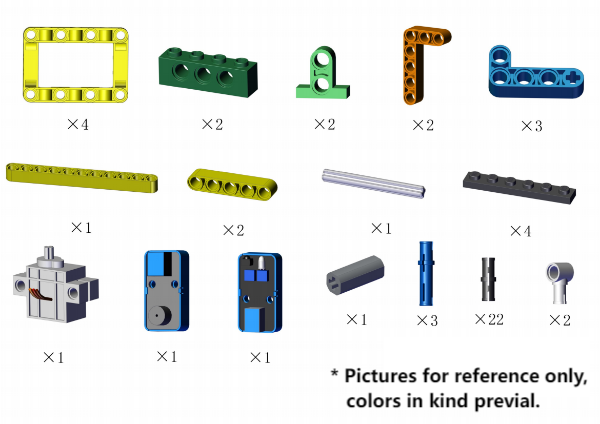
Required:
Step 1 to 10 are the same as those in 4.4, so you can directly use the form in 4.4 here.
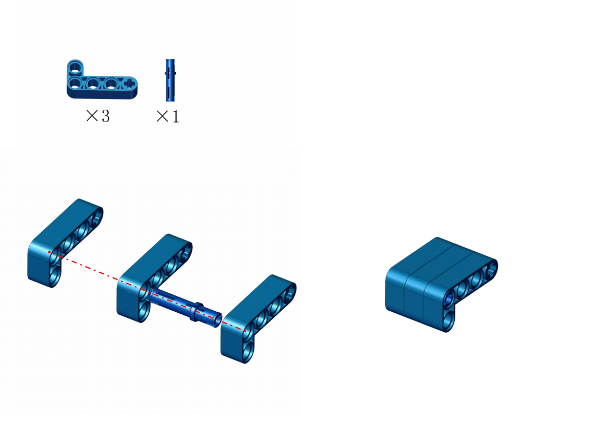
① Remove the joystick.
② mount from step 11.
Yet if you have not assemble the building blocks in 4.4, please start from step 1.
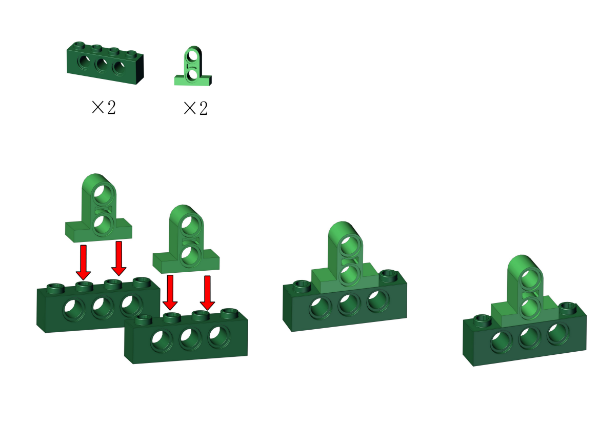
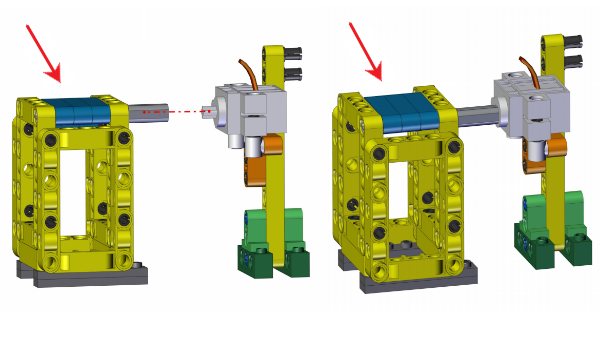
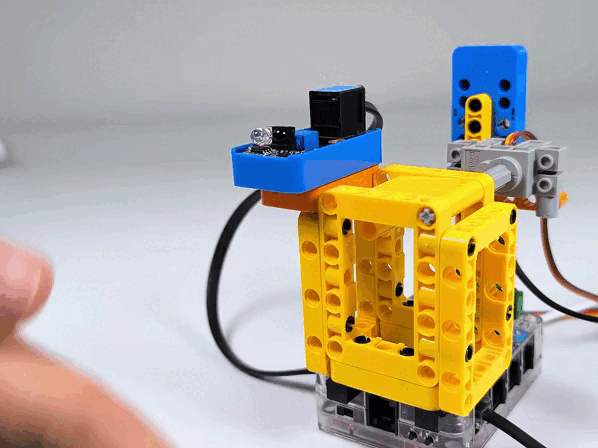
Step 1
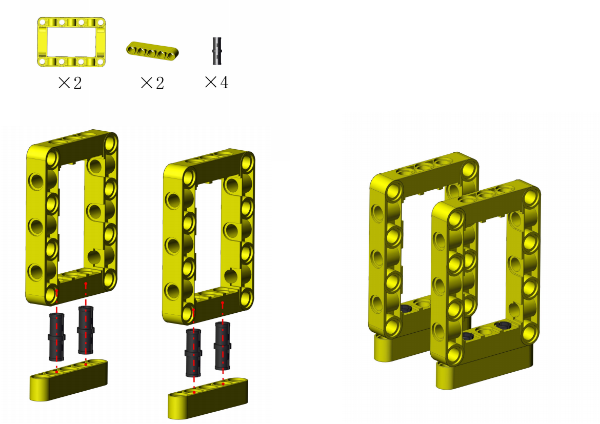
Step 2
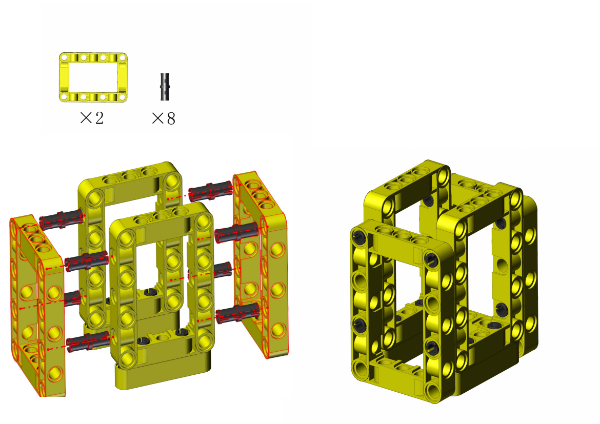
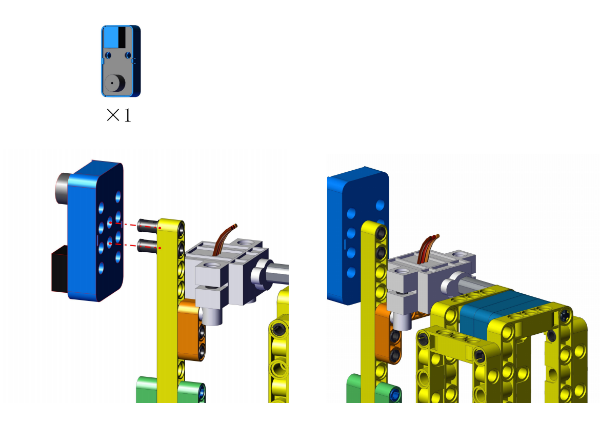
Step 3
Step 4
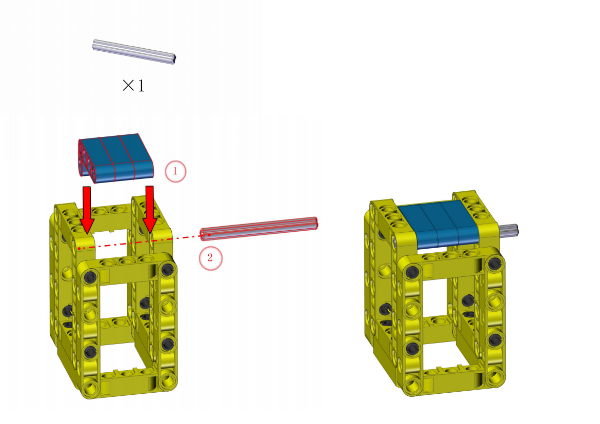
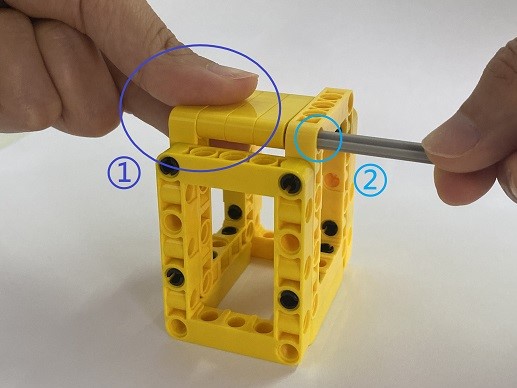
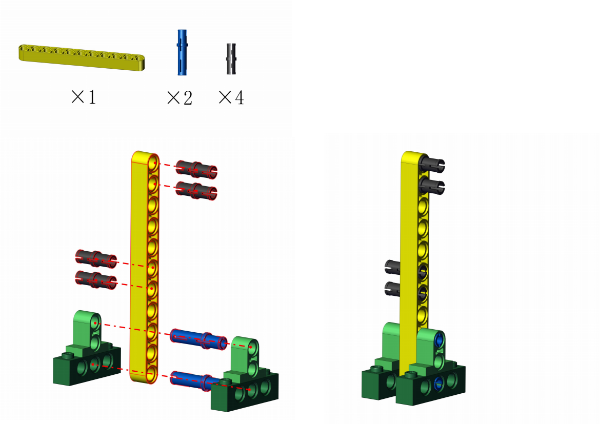
① Hold with your fingers.
② Insert the rod.
ATTENTION: keep the lid flatwise.
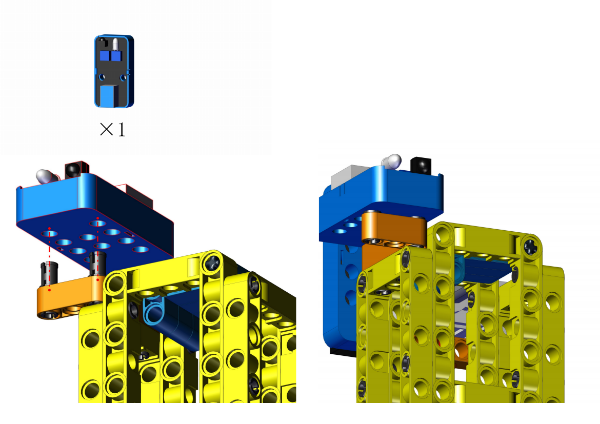
Step 5
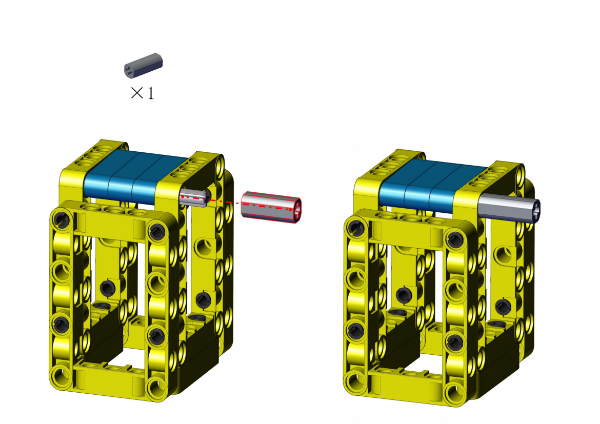
Step 6
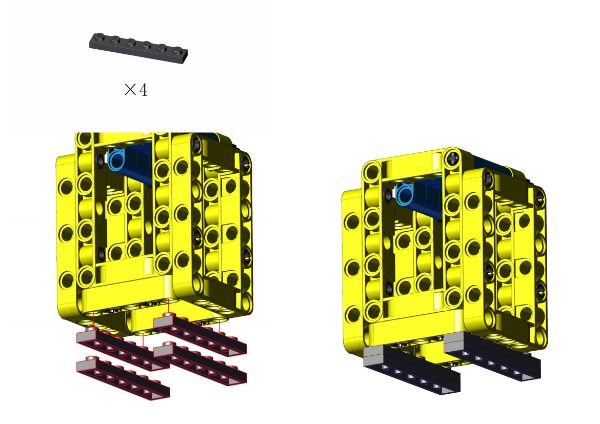
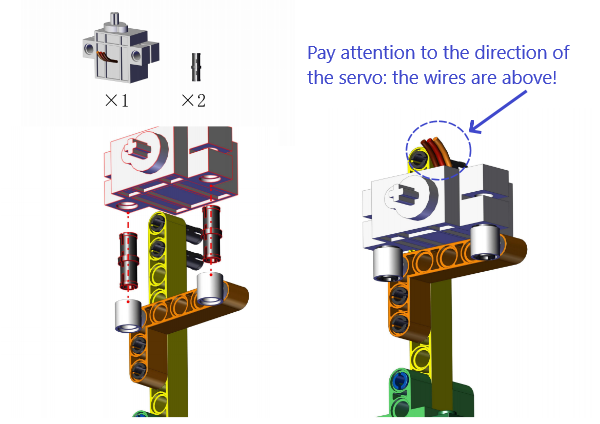
Step 7
Step 8
Step 9

Step 10
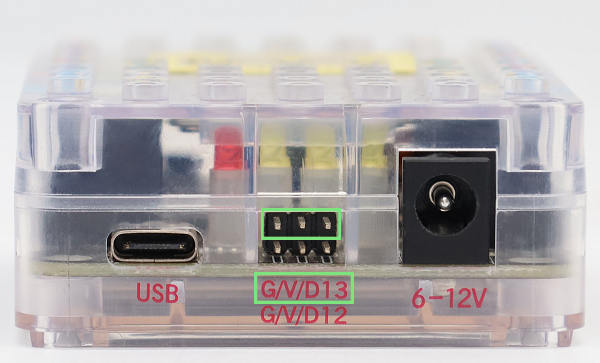
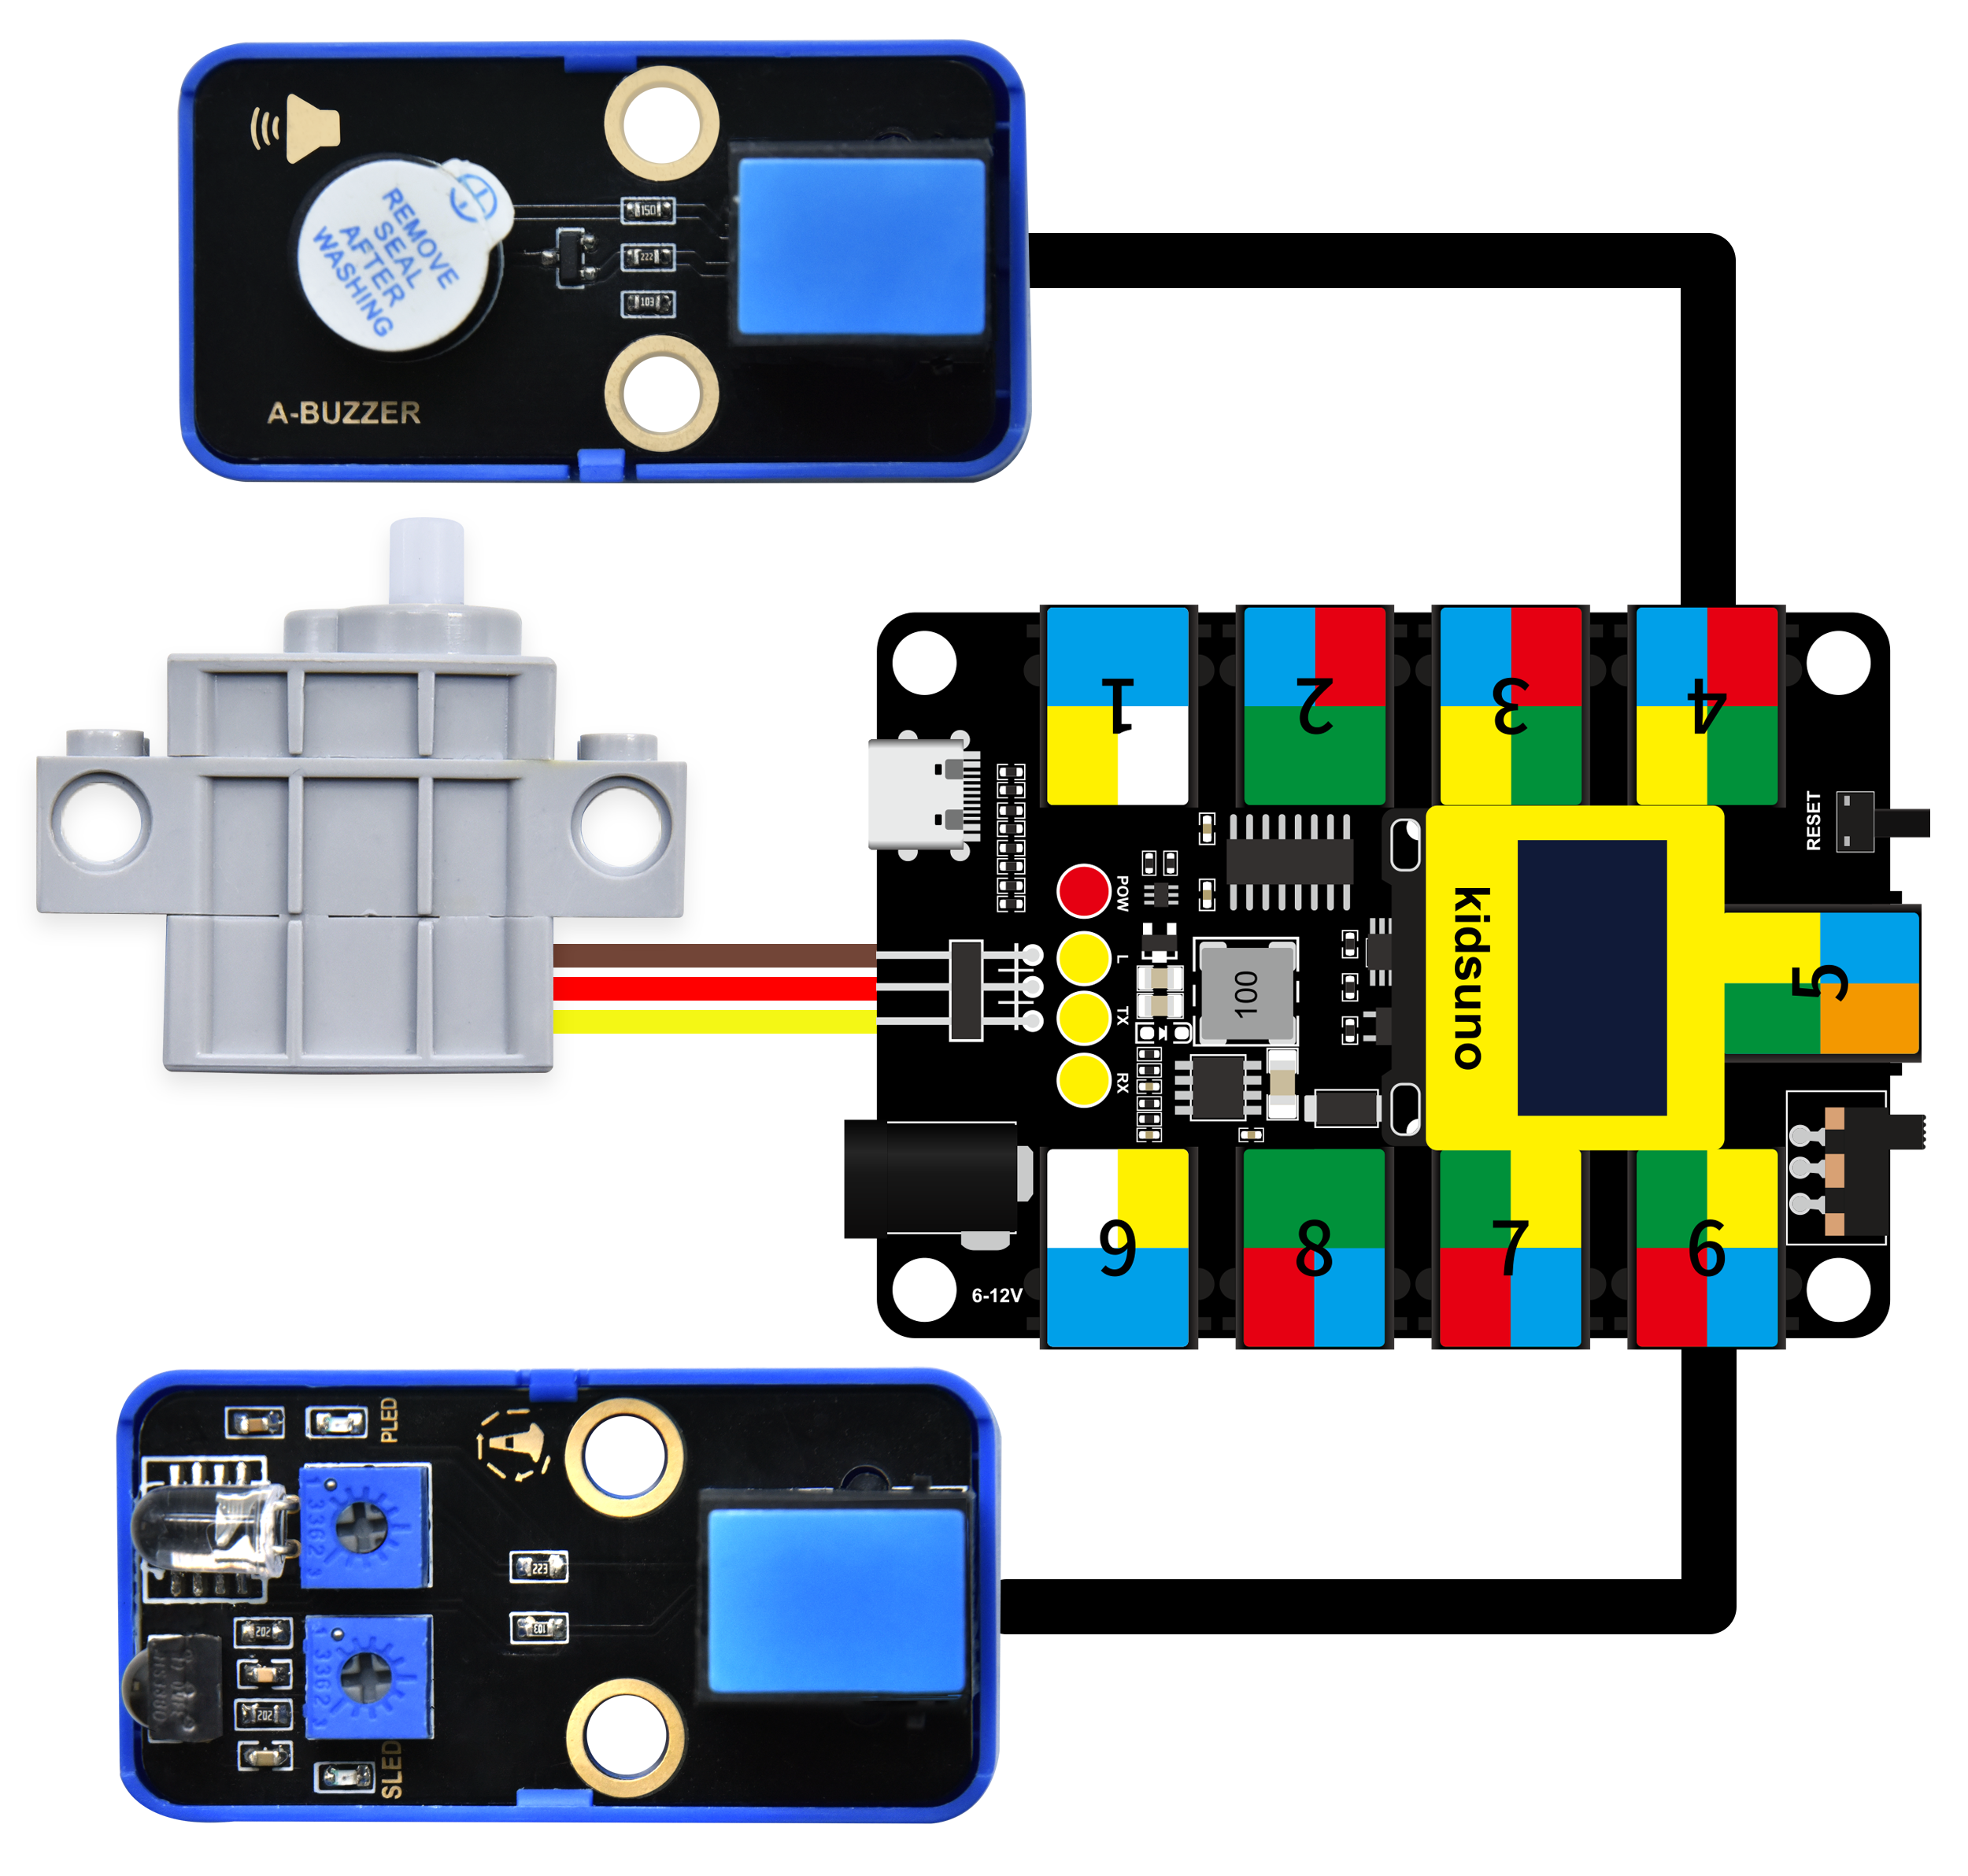
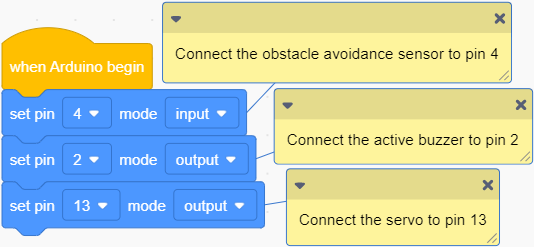
The servo need to be calibrated before using. Connect the servo to pin 13 on the board and link the board to computer via USB cable.
Open KidsBlock and connect to the board, click File –> Load from your computer.

Choose D:\Code\1.Code_kidsuno to open Servo_Calibration.sb3

Click  to connect to port and then
  .
.
After calibration, disconnect the board to computer and continue to mount.
ATTENTION: During mounting, please hold and keep the lid flatwise.
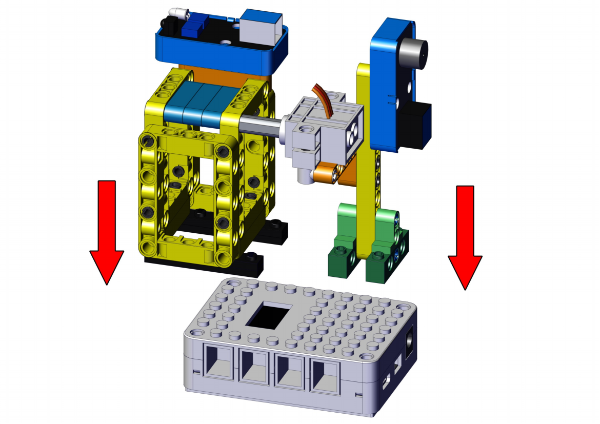
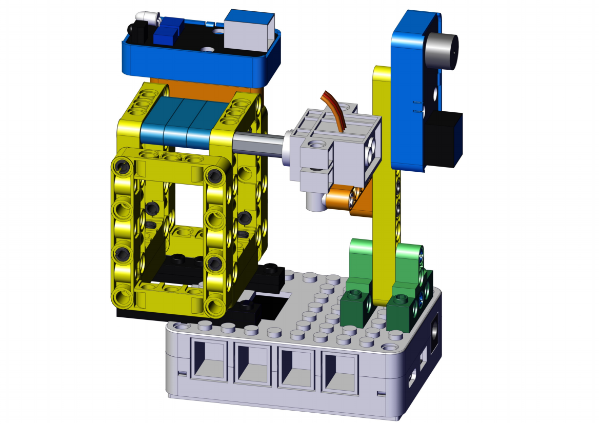
Step 11
Step 12

Step 13
Step 14
Completed!
Open KidsBlock and connect to the board, click File –> Load from your computer.
Choose D:\Code\1.Code_kidsuno to open 4.5Smart bin_Automatic mode.sb3
Click to connect to port and the code.

Code Blocks
|
Blocks |
Code block |
|---|---|
|
|
|
|
|
|
|
|
|
|
|
|
|
|
|
|
|
|
|
|
|
|
|
|
|
|
|

Conceive:
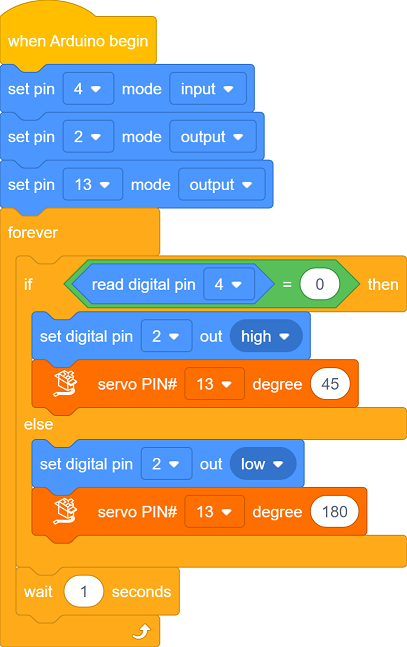
Initialization
Set the pins of obstacle avoidance sensor, buzzer and servo.

Main Code
Loop: Determine whether the read value equals 0.
If it is 0, i.e., the sensor detects obstacles, the buzzer will receive a high level so then emit sound. At this time, the servo rotates to 45° to open the lid.
If it is not 0, i.e., the sensor detects nothing, the buzzer will not alarm. At this time, the servo rotates to 180° to close the lid.


Q :Function of the DELAY block?
When the obstacle is leaving the sensing range, the lid will immediately close without delay. Thus, we add a delay time to maintain the state of the lid.
A :Delay is used to maintain the state of the lid, which can be modified according to your needs.


Follow Us


